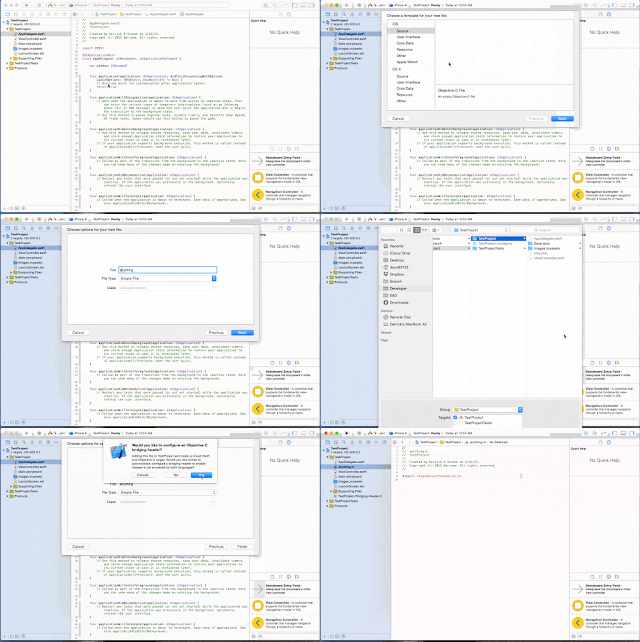
Here are step-by-step instructions for using Objective-C code (in this case, a framework provided by a third-party) in a Swift project.
- Add any Objective-C file to your Swift project by choosing File > New > New File > Objective-C File. Upon saving, XCode will ask if you want to add a bridging header. Choose 'Yes'.
 In simple step 1: prompt appear than click on ok.. if it is not appear than we create manually like follow.. create one header file from iOS source and give the name ProjectName-Bridging-Header(ex:Test-Bridging-Header) and than go to build setting in swift compiler code-> Objective-C bridge add Objective-C bridge name ..(Test/Test-Bridging-Header.h) yeah thats complete.
 - Optionally, delete the Objective-C file you added (named "anything" in the gif above), you don't need it anymore.
- Open the bridging header file -- the filename is of the form [YourProject]-Bridging-Header.h. It includes an Xcode-provided comment. Add a line of code for the Objective-C file you want to include, such as a 3rd-party framework.
- Now in any Swift file you can use existing Objective-C code, in the Swift syntax
if you remove the bridging header file from your project, be sure to go into Build Settings and remove the value for "Objective-C Bridging Header" under "Swift Compiler - Code Generation".
No comments:
Post a Comment